


How to Install Windows 11 Pro from USB – Step-by-Step Guide
Learn how to install Windows 11 Professional from a USB flash drive. Complete step-by-step guide for clean installation, bootable USB creation, and setup.

This tutorial shows how to install Windows 11 Professional from a USB flash drive using a clean installation method. Each step is clearly explained, with screenshot placeholders so you can follow along visually.
This method is ideal if you are:
-
Installing Windows on a new PC
-
Reinstalling Windows 11 Pro
-
Fixing boot or system errors
-
Upgrading from Windows 10 using a clean install
Requirements Before You Begin
Before starting the installation, prepare the following:
-
USB flash drive (8GB or larger)
-
Windows 11 Professional ISO or Media Creation Tool
-
A compatible PC (TPM 2.0, Secure Boot, 64-bit CPU)
-
Backup of important data
Step 1: Create a Bootable Windows 11 USB

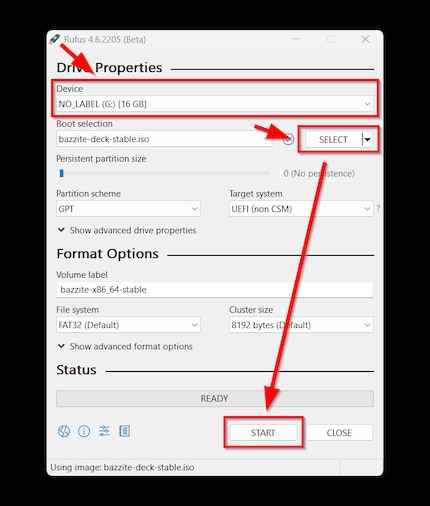
Screenshot: Windows 11 Media Creation Tool / Rufus settings
Option 1: Using Media Creation Tool (Recommended)
-
Download the Windows 11 Media Creation Tool
-
Run the tool and accept the license agreement
-
Select Create installation media
-
Choose USB flash drive
-
Wait for the process to finish
Option 2: Using ISO File with Rufus
-
Download the Windows 11 ISO file
-
Open Rufus and select your USB drive
-
Set:
-
Partition scheme: GPT
-
Target system: UEFI
-
-
Click Start
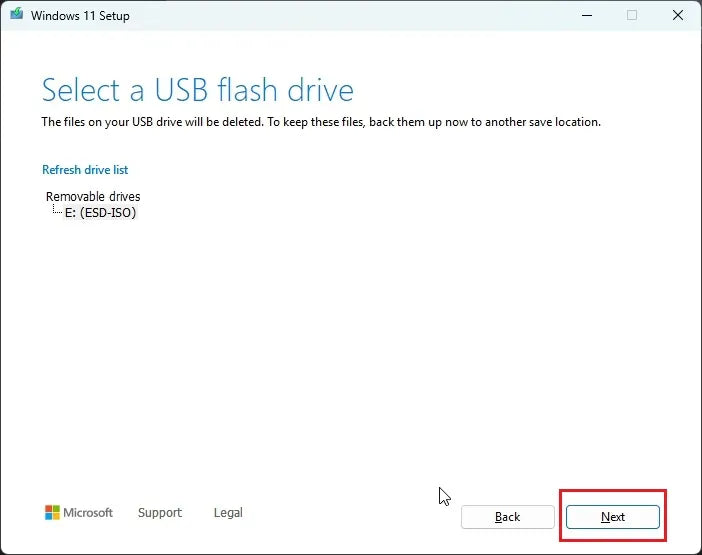
Step 2: Boot Your PC from USB

Screenshot: Boot Menu screen
-
Insert the bootable USB
-
Restart your PC
-
Press the Boot Menu key (F12 / F11 / ESC / F9)
-
Select UEFI: USB Flash Drive
Step 3: Start Windows 11 Setup
Screenshot: Language and Install Now screen
-
Select Language, Time, and Keyboard layout
-
Click Next
-
Click Install Now
Step 4: Enter Product Key and Select Edition

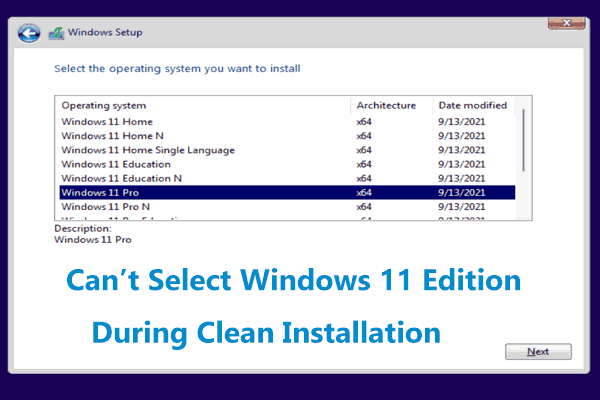
Screenshot: Product key and edition selection
-
Enter your Windows 11 Pro product key, or click I don’t have a product key
-
Select Windows 11 Pro
-
Click Next
Step 5: Accept License Agreement

Screenshot: License agreement page
-
Check I accept the license terms
-
Click Next
Step 6: Choose Installation Type

Screenshot: Custom installation and partition screen
-
Select Custom: Install Windows only (advanced)
-
For clean install:
-
Delete existing system partitions
-
Select Unallocated Space
-
-
Click Next
⚠️ All data on the selected drive will be deleted.
Step 7: Installing Windows 11 Professional
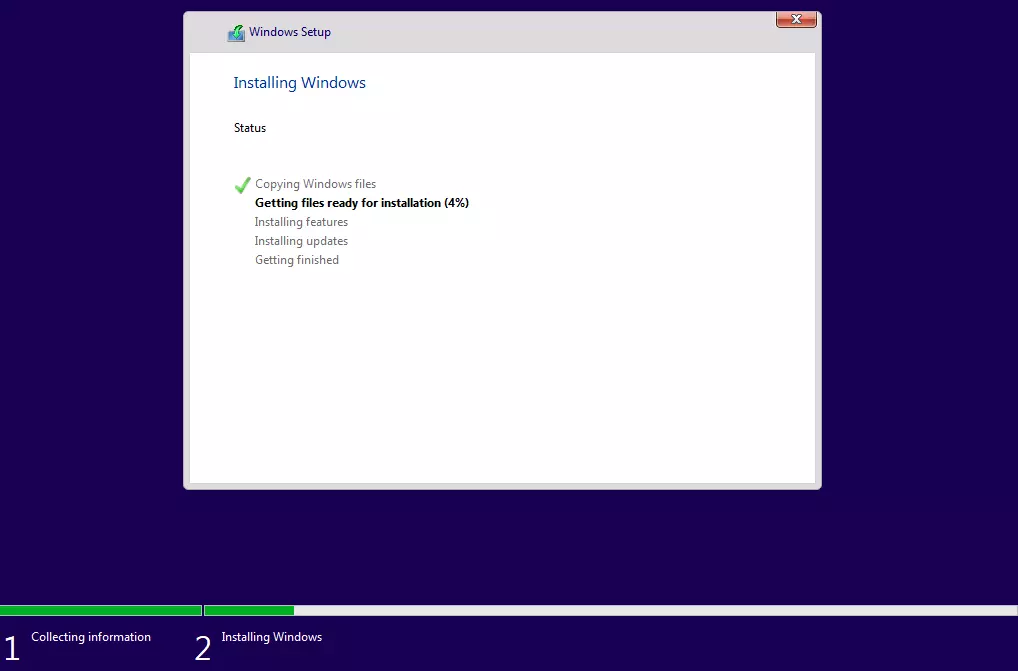

Screenshot: Installation progress
-
Windows will copy files and install features
-
The system will restart automatically
-
Do not remove the USB until setup is complete
Step 8: Complete Windows 11 Initial Setup

Screenshot: OOBE setup screens
-
Select your region and keyboard
-
Connect to the internet
-
Sign in with a Microsoft account (or create an offline account)
-
Set up a PIN and privacy options
Step 9: Finish Installation and Update Windows

Screenshot: Windows 11 desktop and update page
-
Open Settings → Windows Update
-
Install all updates
-
Install missing drivers
-
Activate Windows 11 Pro
Final Notes
Installing Windows 11 Pro from USB using a clean installation ensures:
-
Better performance
-
Fewer errors
-
A fresh and secure system
What's Your Reaction?
 Like
1
Like
1
 Dislike
0
Dislike
0
 Love
1
Love
1
 Funny
0
Funny
0
 Angry
0
Angry
0
 Sad
0
Sad
0
 Wow
1
Wow
1

